 A Jig for Cutting Perfect Fin Slots
Article: 1784
By Bryan Whitemarsh, December 2009
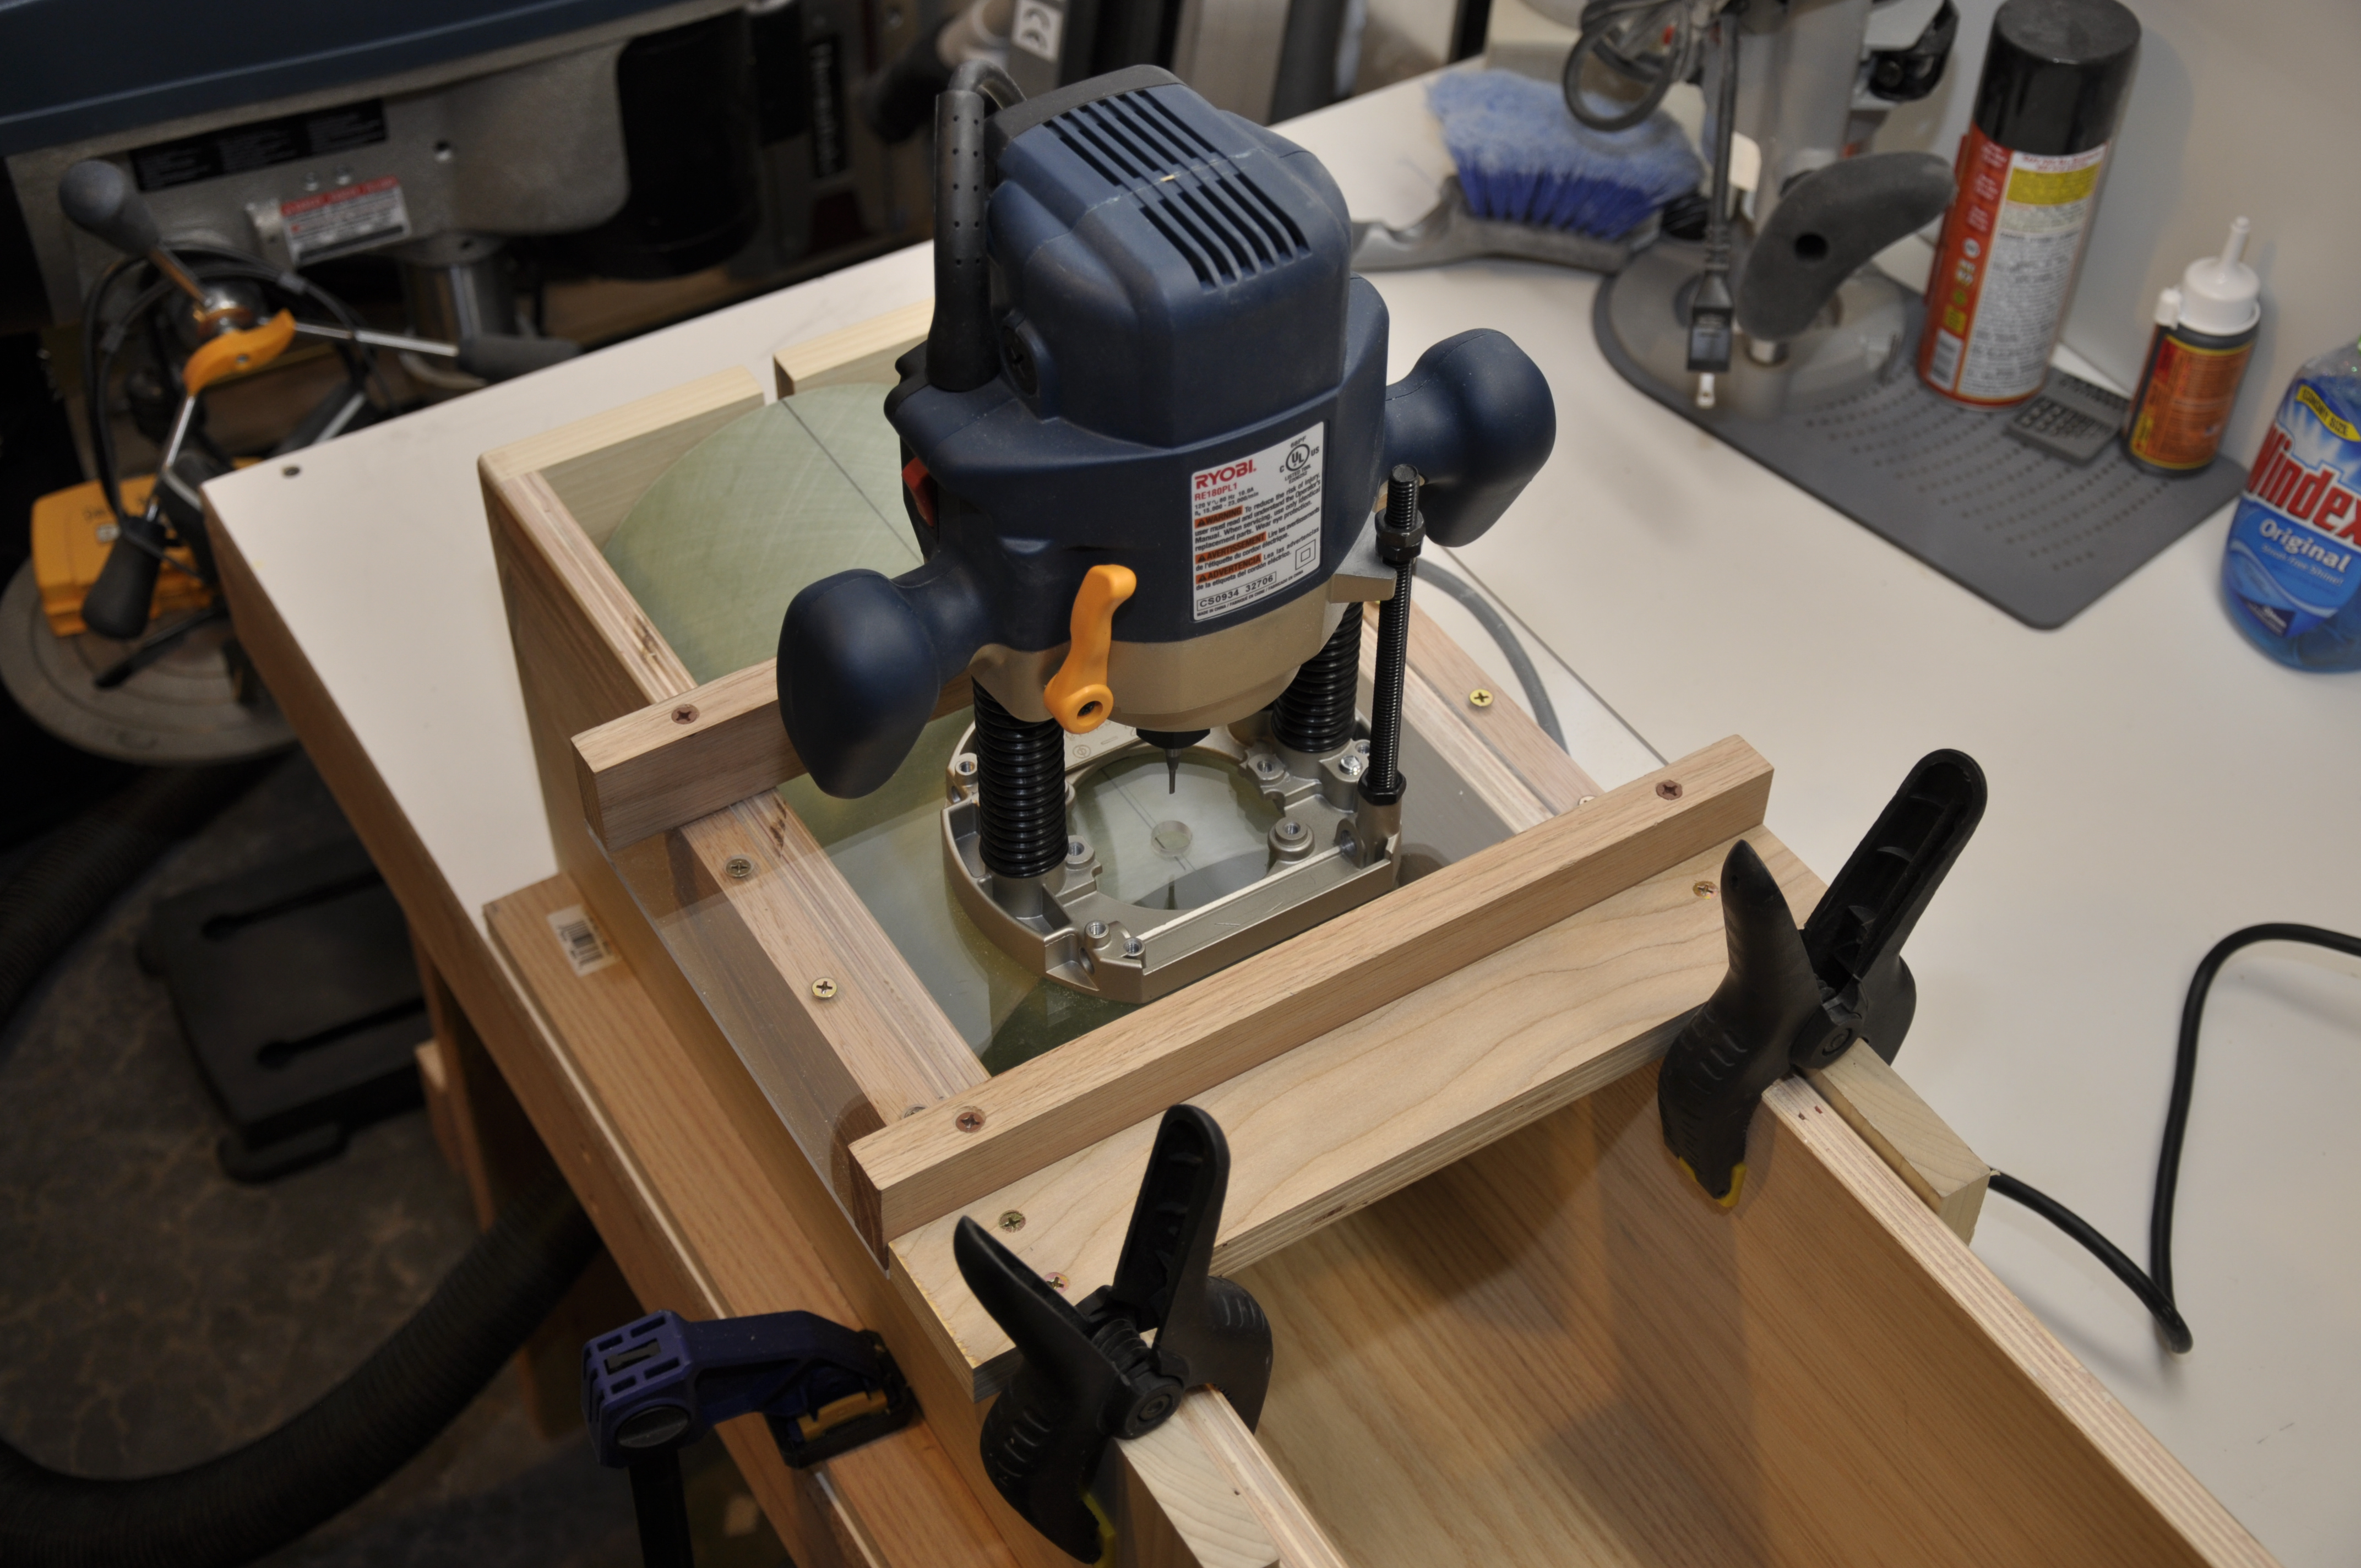
The components for the 8" jig are shown, including the guide at the bottom, the router carriage on the top left, and the two stops on the top right.
Setup for cutting from the center to the end of an airframe. One stop is in place. Note the notch in the end of the jig to allow passage of a bit through the end.
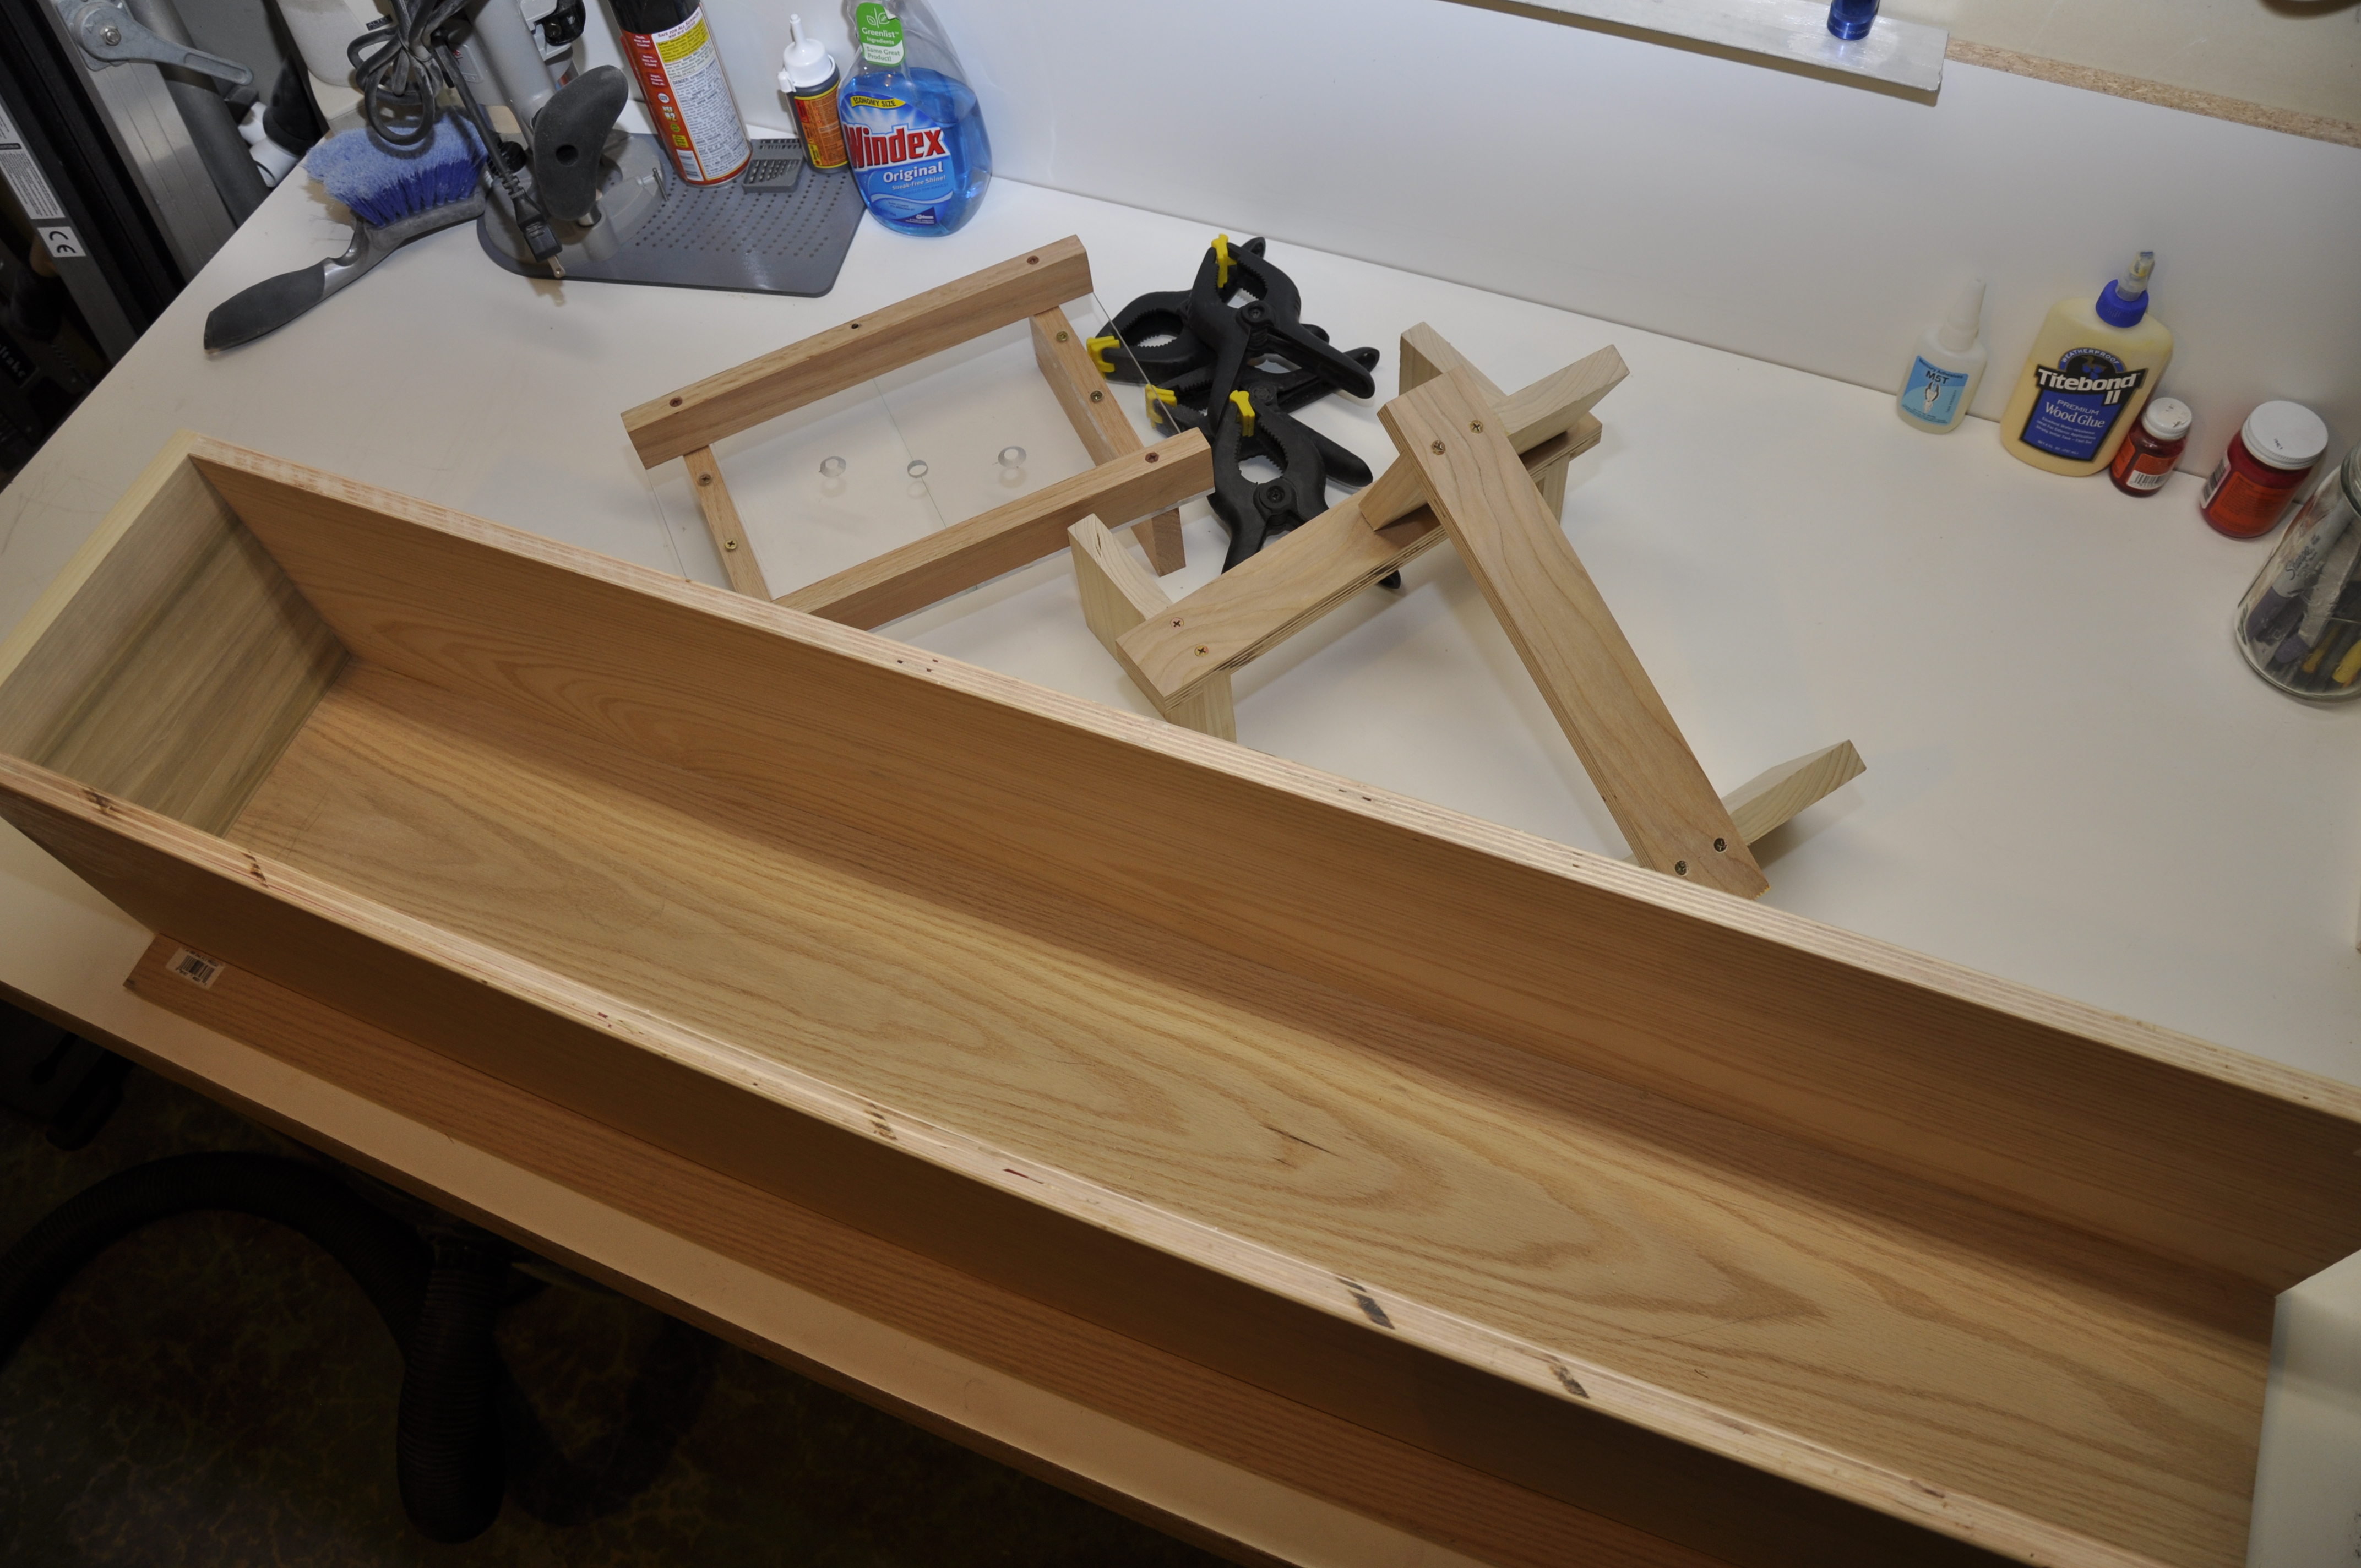
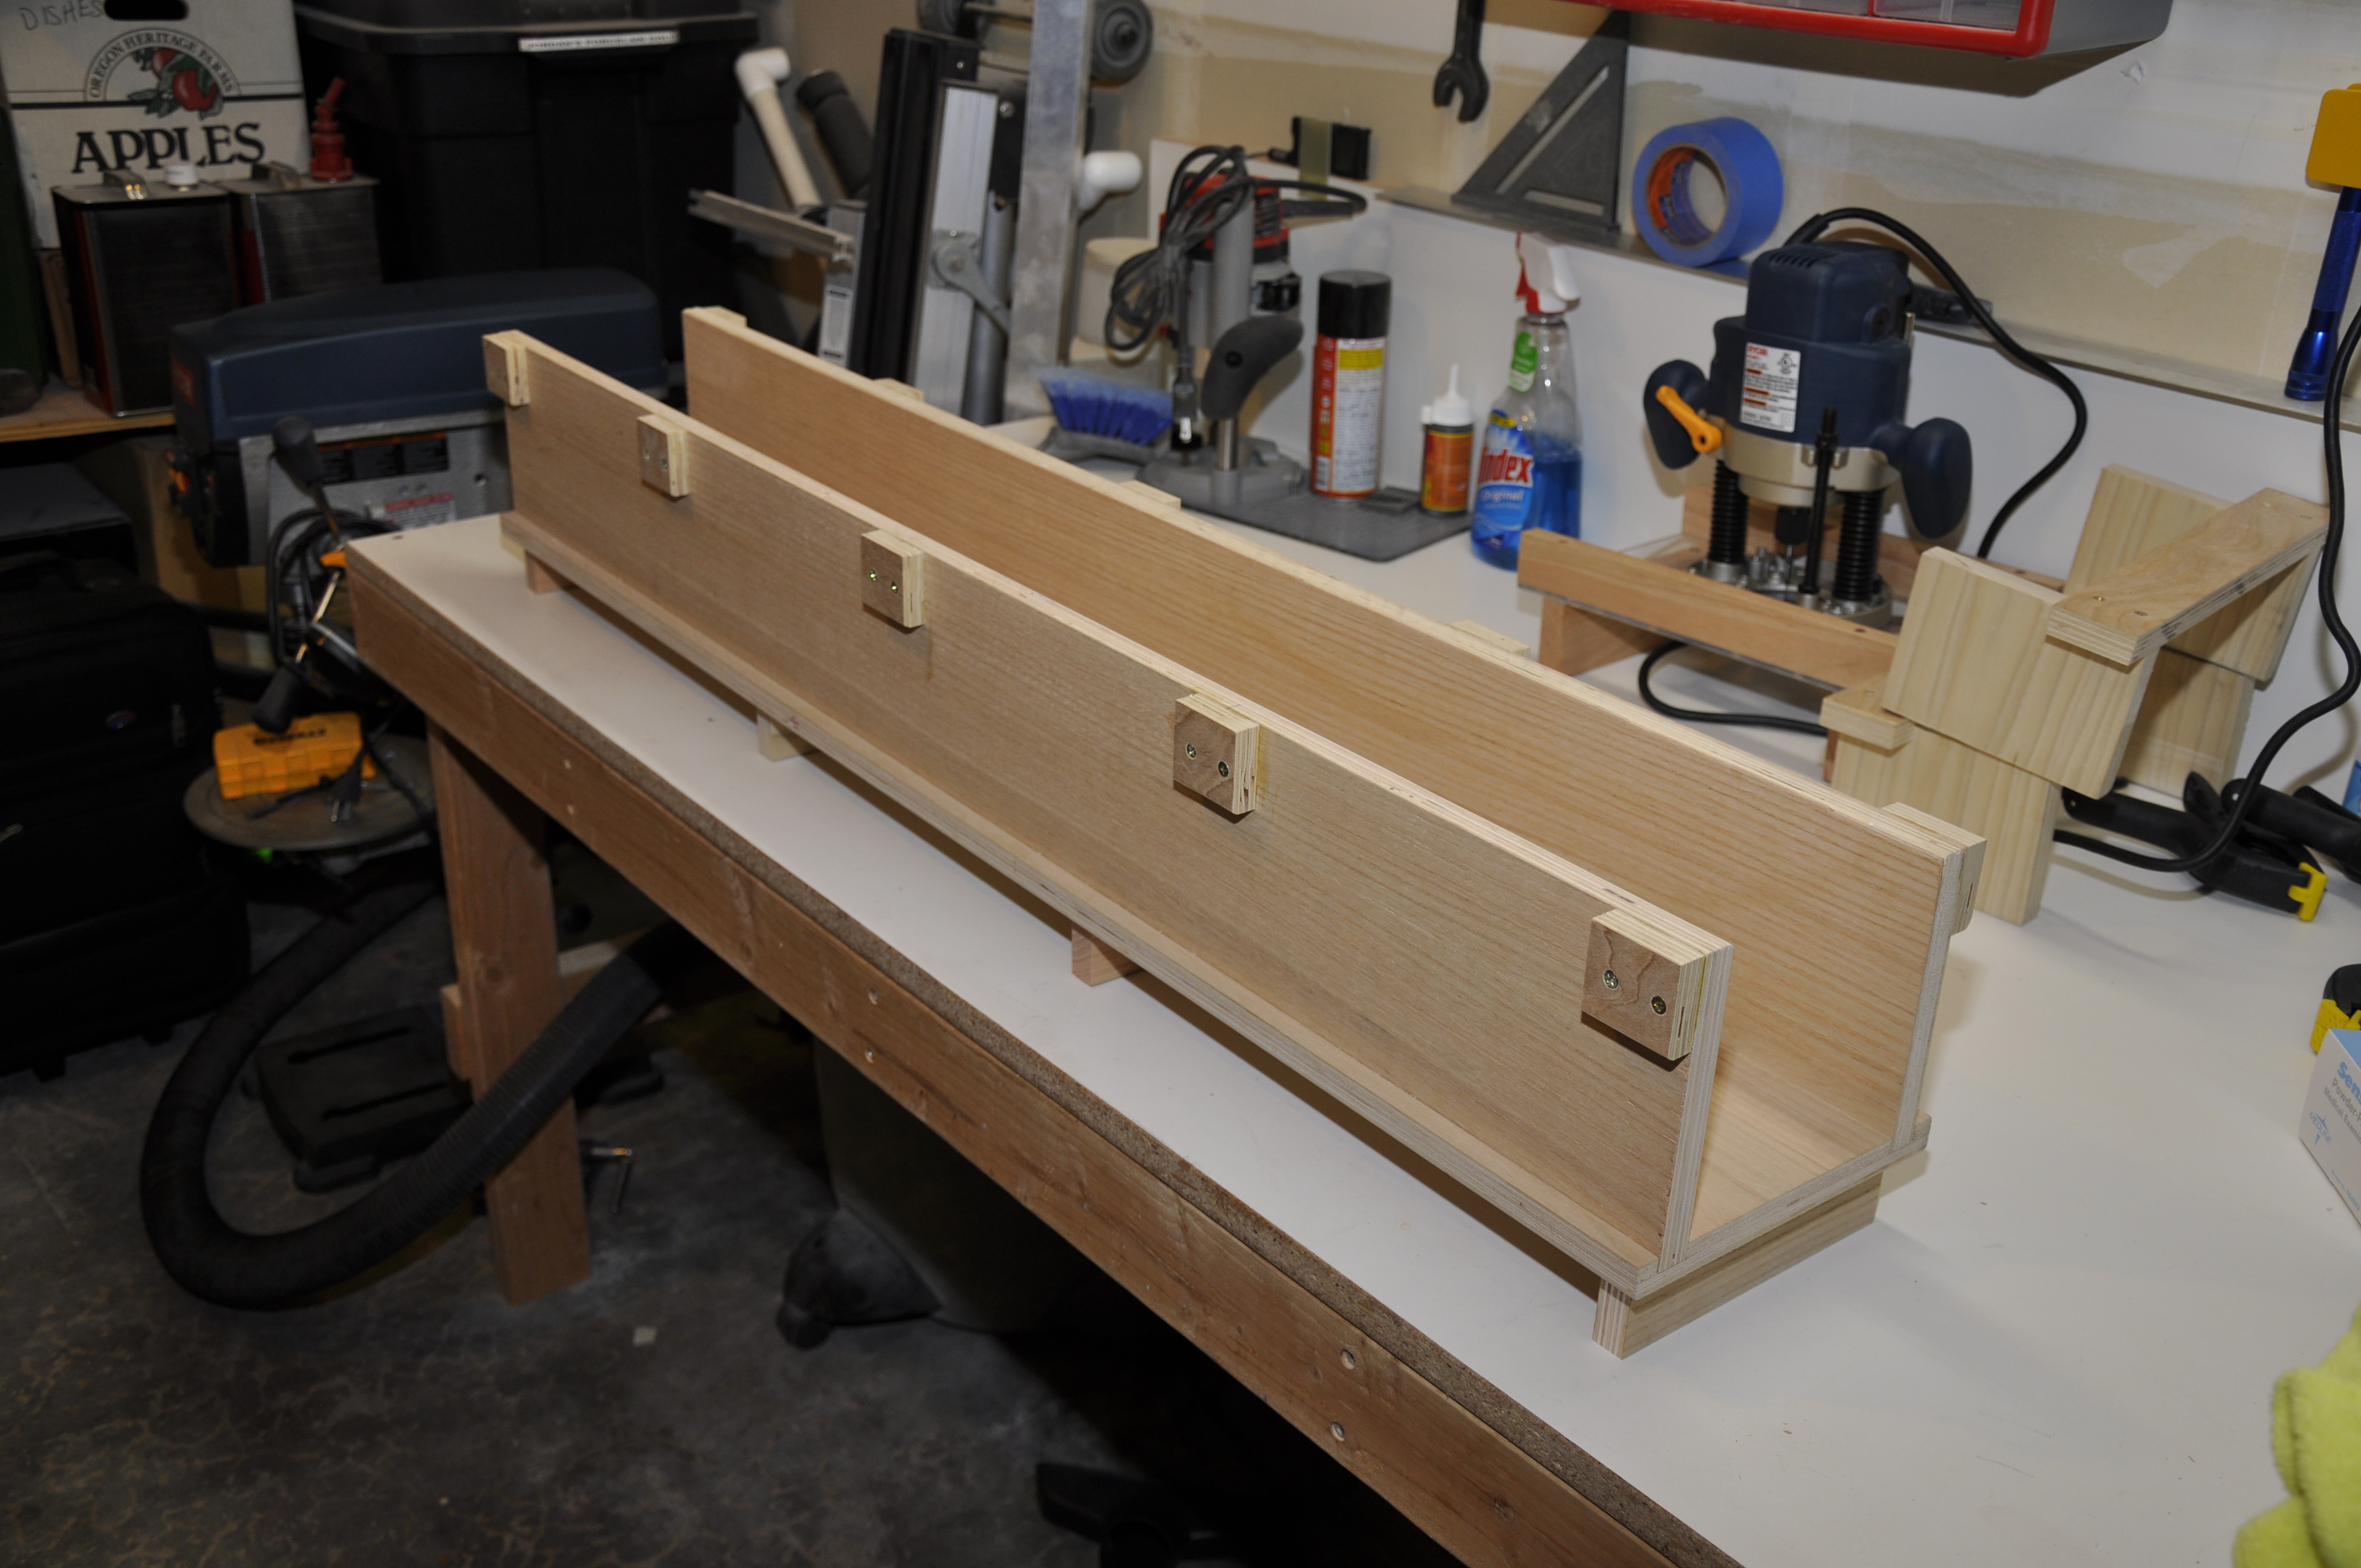
The first iteration was for my son’s Binder Design “Stealth” kit. This is a 4″ kraft tube kit from Mike Fisher (http://binderdesign.com/). The fin slots were marked but not cut. Since I don’t trust myself to cut straight slots, I was pretty sure my very impatient 14-year old son would have trouble as well. Although I liked Vern’s design, his is set up for a standard router and requires that the cut start at one end of the airframe. I decided to build mine for a plunge router so that the cut could start and end at any point on the airframe. I was concerned about flexing of the plexiglass from pressing down on the plunge router, so I built a reinforced router carriage. I also wanted more positive end points for my cuts, so I built stops that can be clamped onto the guiderails at any point. Finally, I closed in one end of the jig. This allows the tubing to butt up against the closed end, eliminating linear motion during cutting.
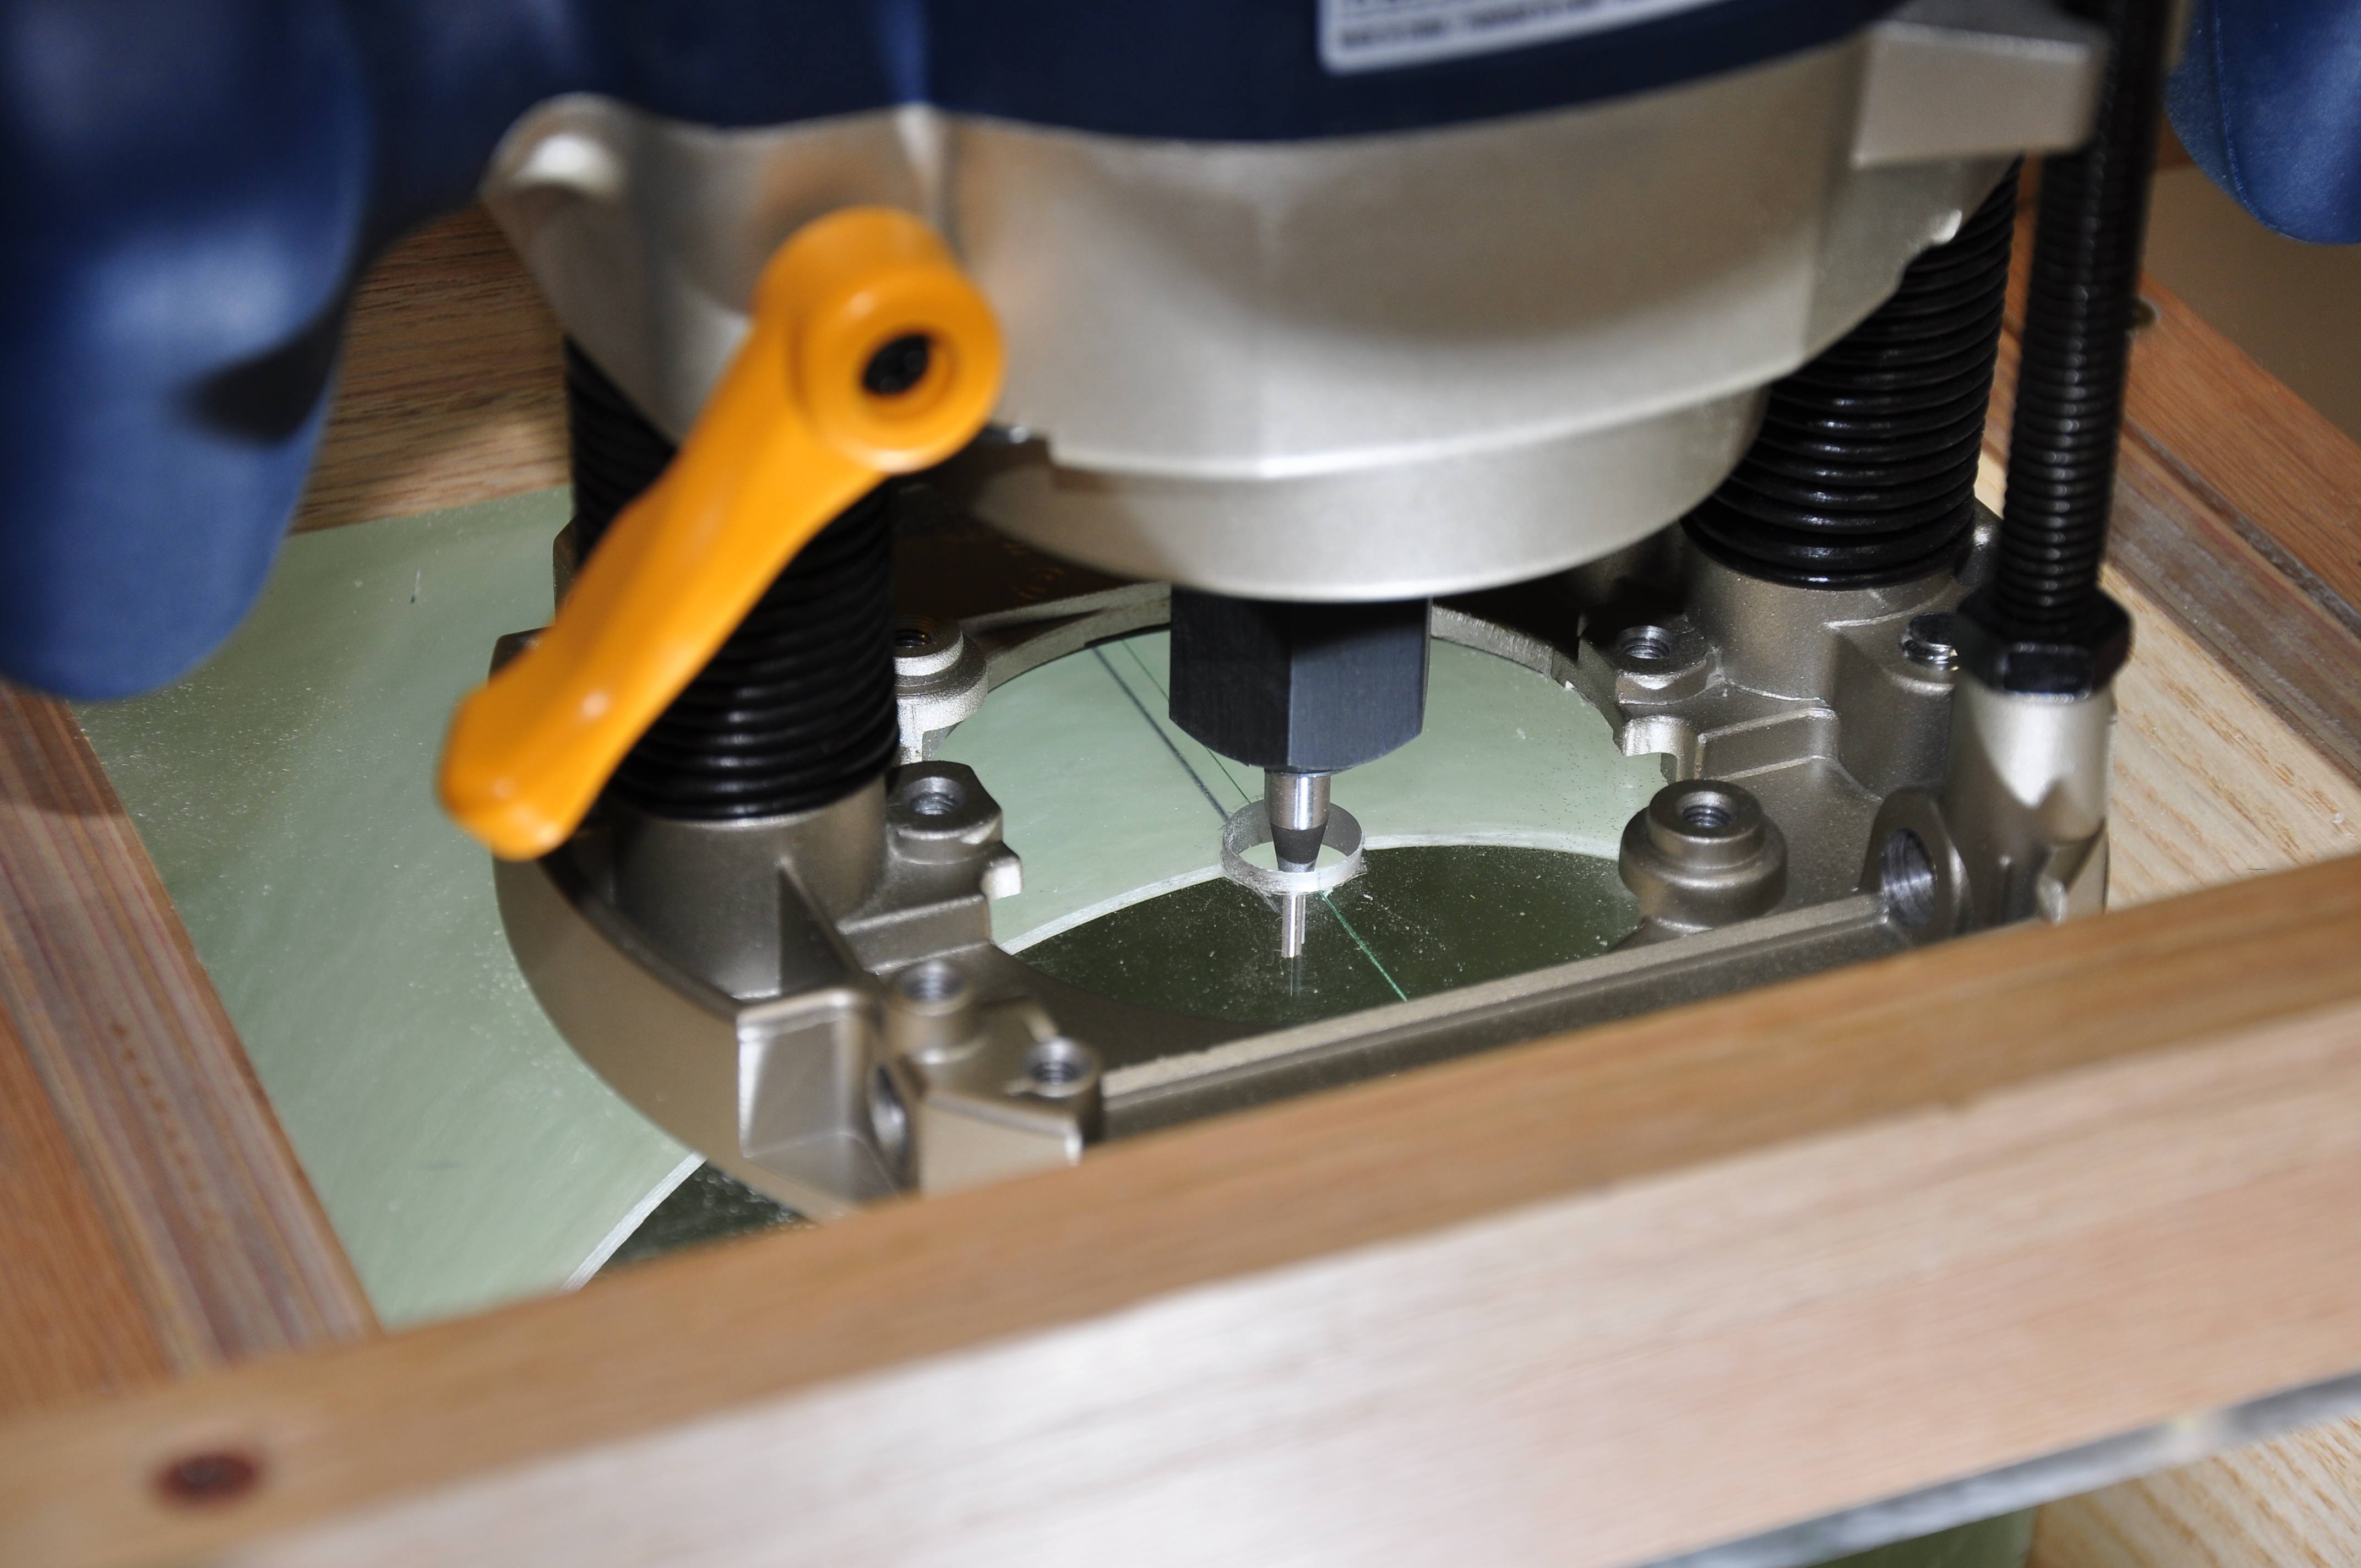
Close-up of the carriage showing the alignment line directly over the fin slot line on the airframe.
My jig is constructed of parts readily obtained from Home Depot. I used 3/4″ oak plywood ($18 for a 4’x4′ half-sheet) for the box and 3/4″ thick oak stock for with 0.22″ Optix acrylic sheet for the carriage. Today’s plywood is thinner than designated, so I also got a 23/32″ router bit for 3/4″ plywood. Using all hardwood stock would eliminate this problem, but the cost is prohibitive. I wanted to create a strong, straight jig, so I used my router to make rabbets in the base to accept both side pieces, thereby helping to hold the sides straight. Skipping this step would avoid the cost of the special router bit. I’m using a Makita variable speed plunge router that was just under $100 at Home Depot.
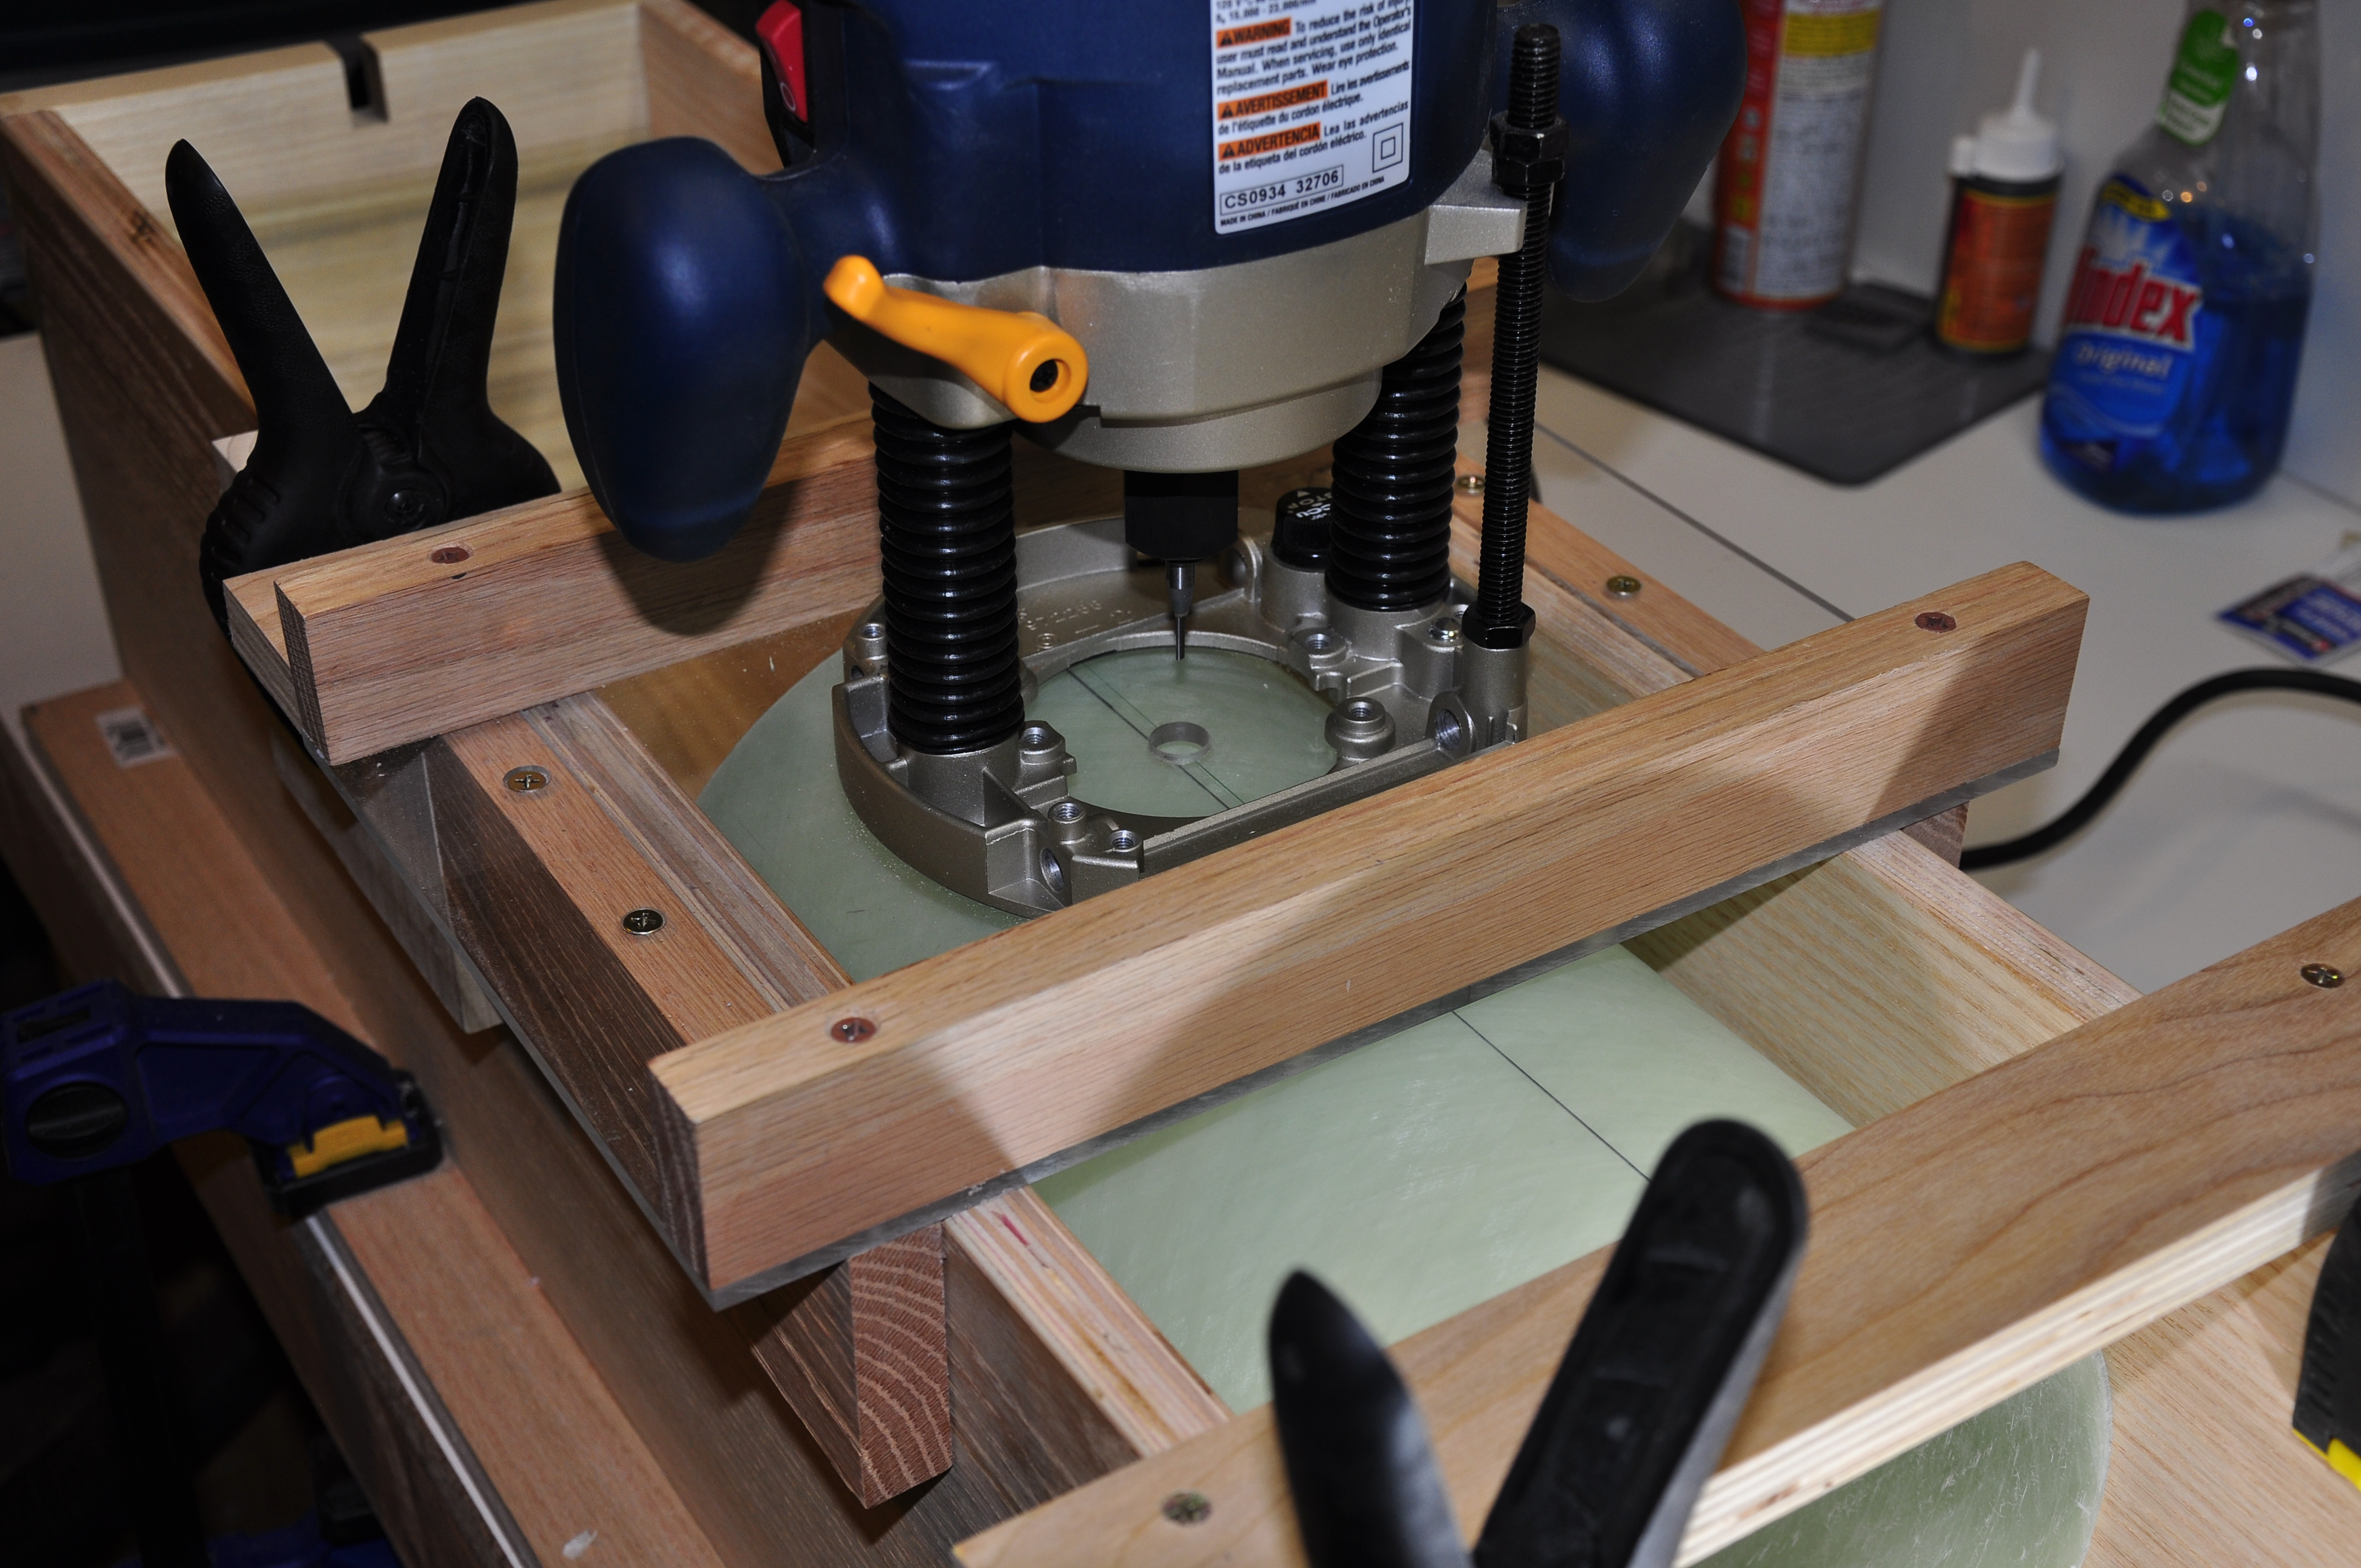
Setup for cutting a fin slot in the center of an airframe. Note that both stops are now in place and the router can now be plunged into the airframe.
The most difficult part of the build was the carriage. Accurately cutting and drilling the 0.22″ Optix acrylic is a little painful. I first used the cutting knife I found next to the acrylic at Home Depot, but that took forever and didn’t leave a satisfactory cut. I ended up cutting it on my table saw with a fine carbide-toothed blade. Amana makes a “non-melt” saw blade for plastics, but I almost melted when I saw the $130 price tag and decided to go with what I had. It worked fine, although it was a little messy. Countersinking screw holes for the 15mm diameter router mounting screw heads was also more difficult than expected. I used a four-flute heavy-duty countersink from Home Depot for this.
The 5.5" insert, showing the shims on the bottom and the sides to center it inside the 8" jig.
Because the carriage was painful to build and the jig itself is little more than a box with one end left off, I decided to try a nesting design. I figured I could use one carriage on a variety of different frame sizes. I therefore built another jig box, this time for 8″ fiberglass airframe for my Level 3 project next winter. I built another reinforced carriage and this time added an alignment mark that is centered in the middle of the router bit to make the cuts more accurate. This was made by using a straight edge and cutting the plexiglass with a utility knife over the center of the router bit opening. The line was filled with a Sharpie marker and the excess ink was wiped away, leaving an easily visible alignment mark.
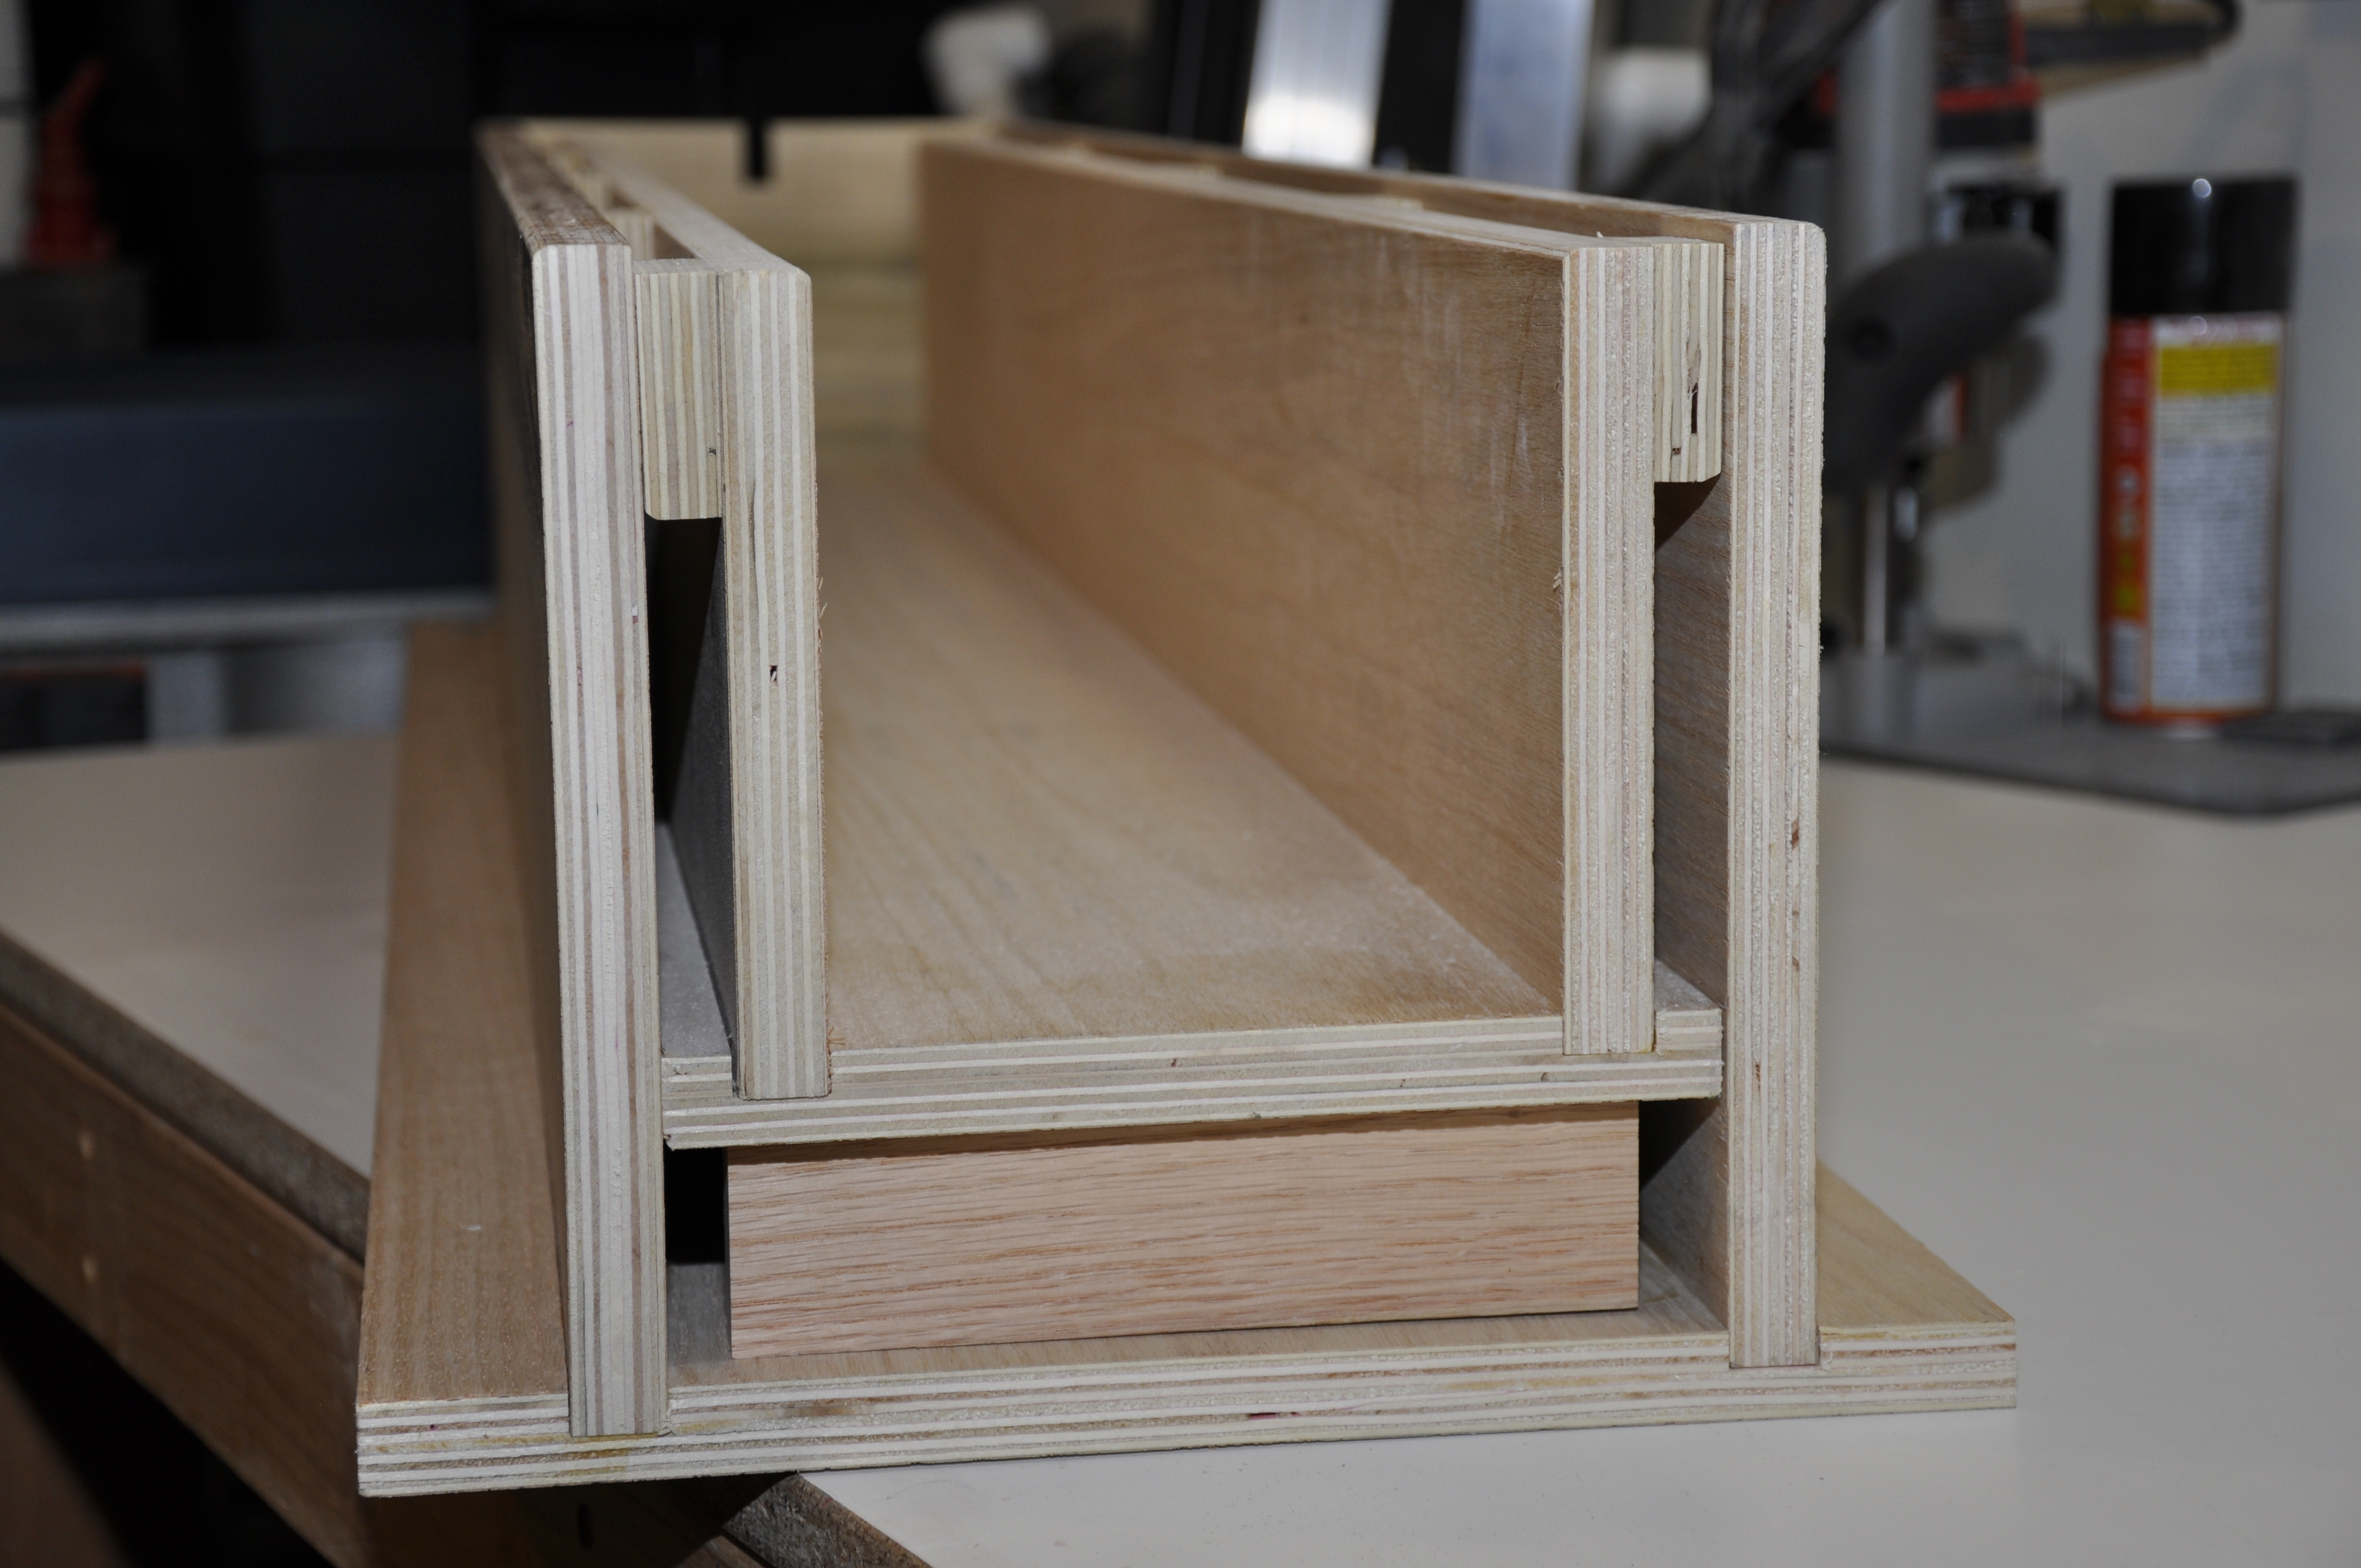
The 5.5" insert is nested in the 8" jig, centering it in relation to the router carriage.
After the 8″ jig was built, all I had to do was nest a smaller jig box inside the 8″ jig and I could use the same router carriage. One of my projects this year will be built from 5.5″ diameter Blue Tube 2 airframe. I built a box with the proper inside dimentions and left both ends open. I added shims to the bottom and both sides to center the smaller jig in the larger one. This will allow me to accurately cut the smaller tubing in the larger jig without having to make another carriage. I plan to make a 38mm box to fit inside this as well.
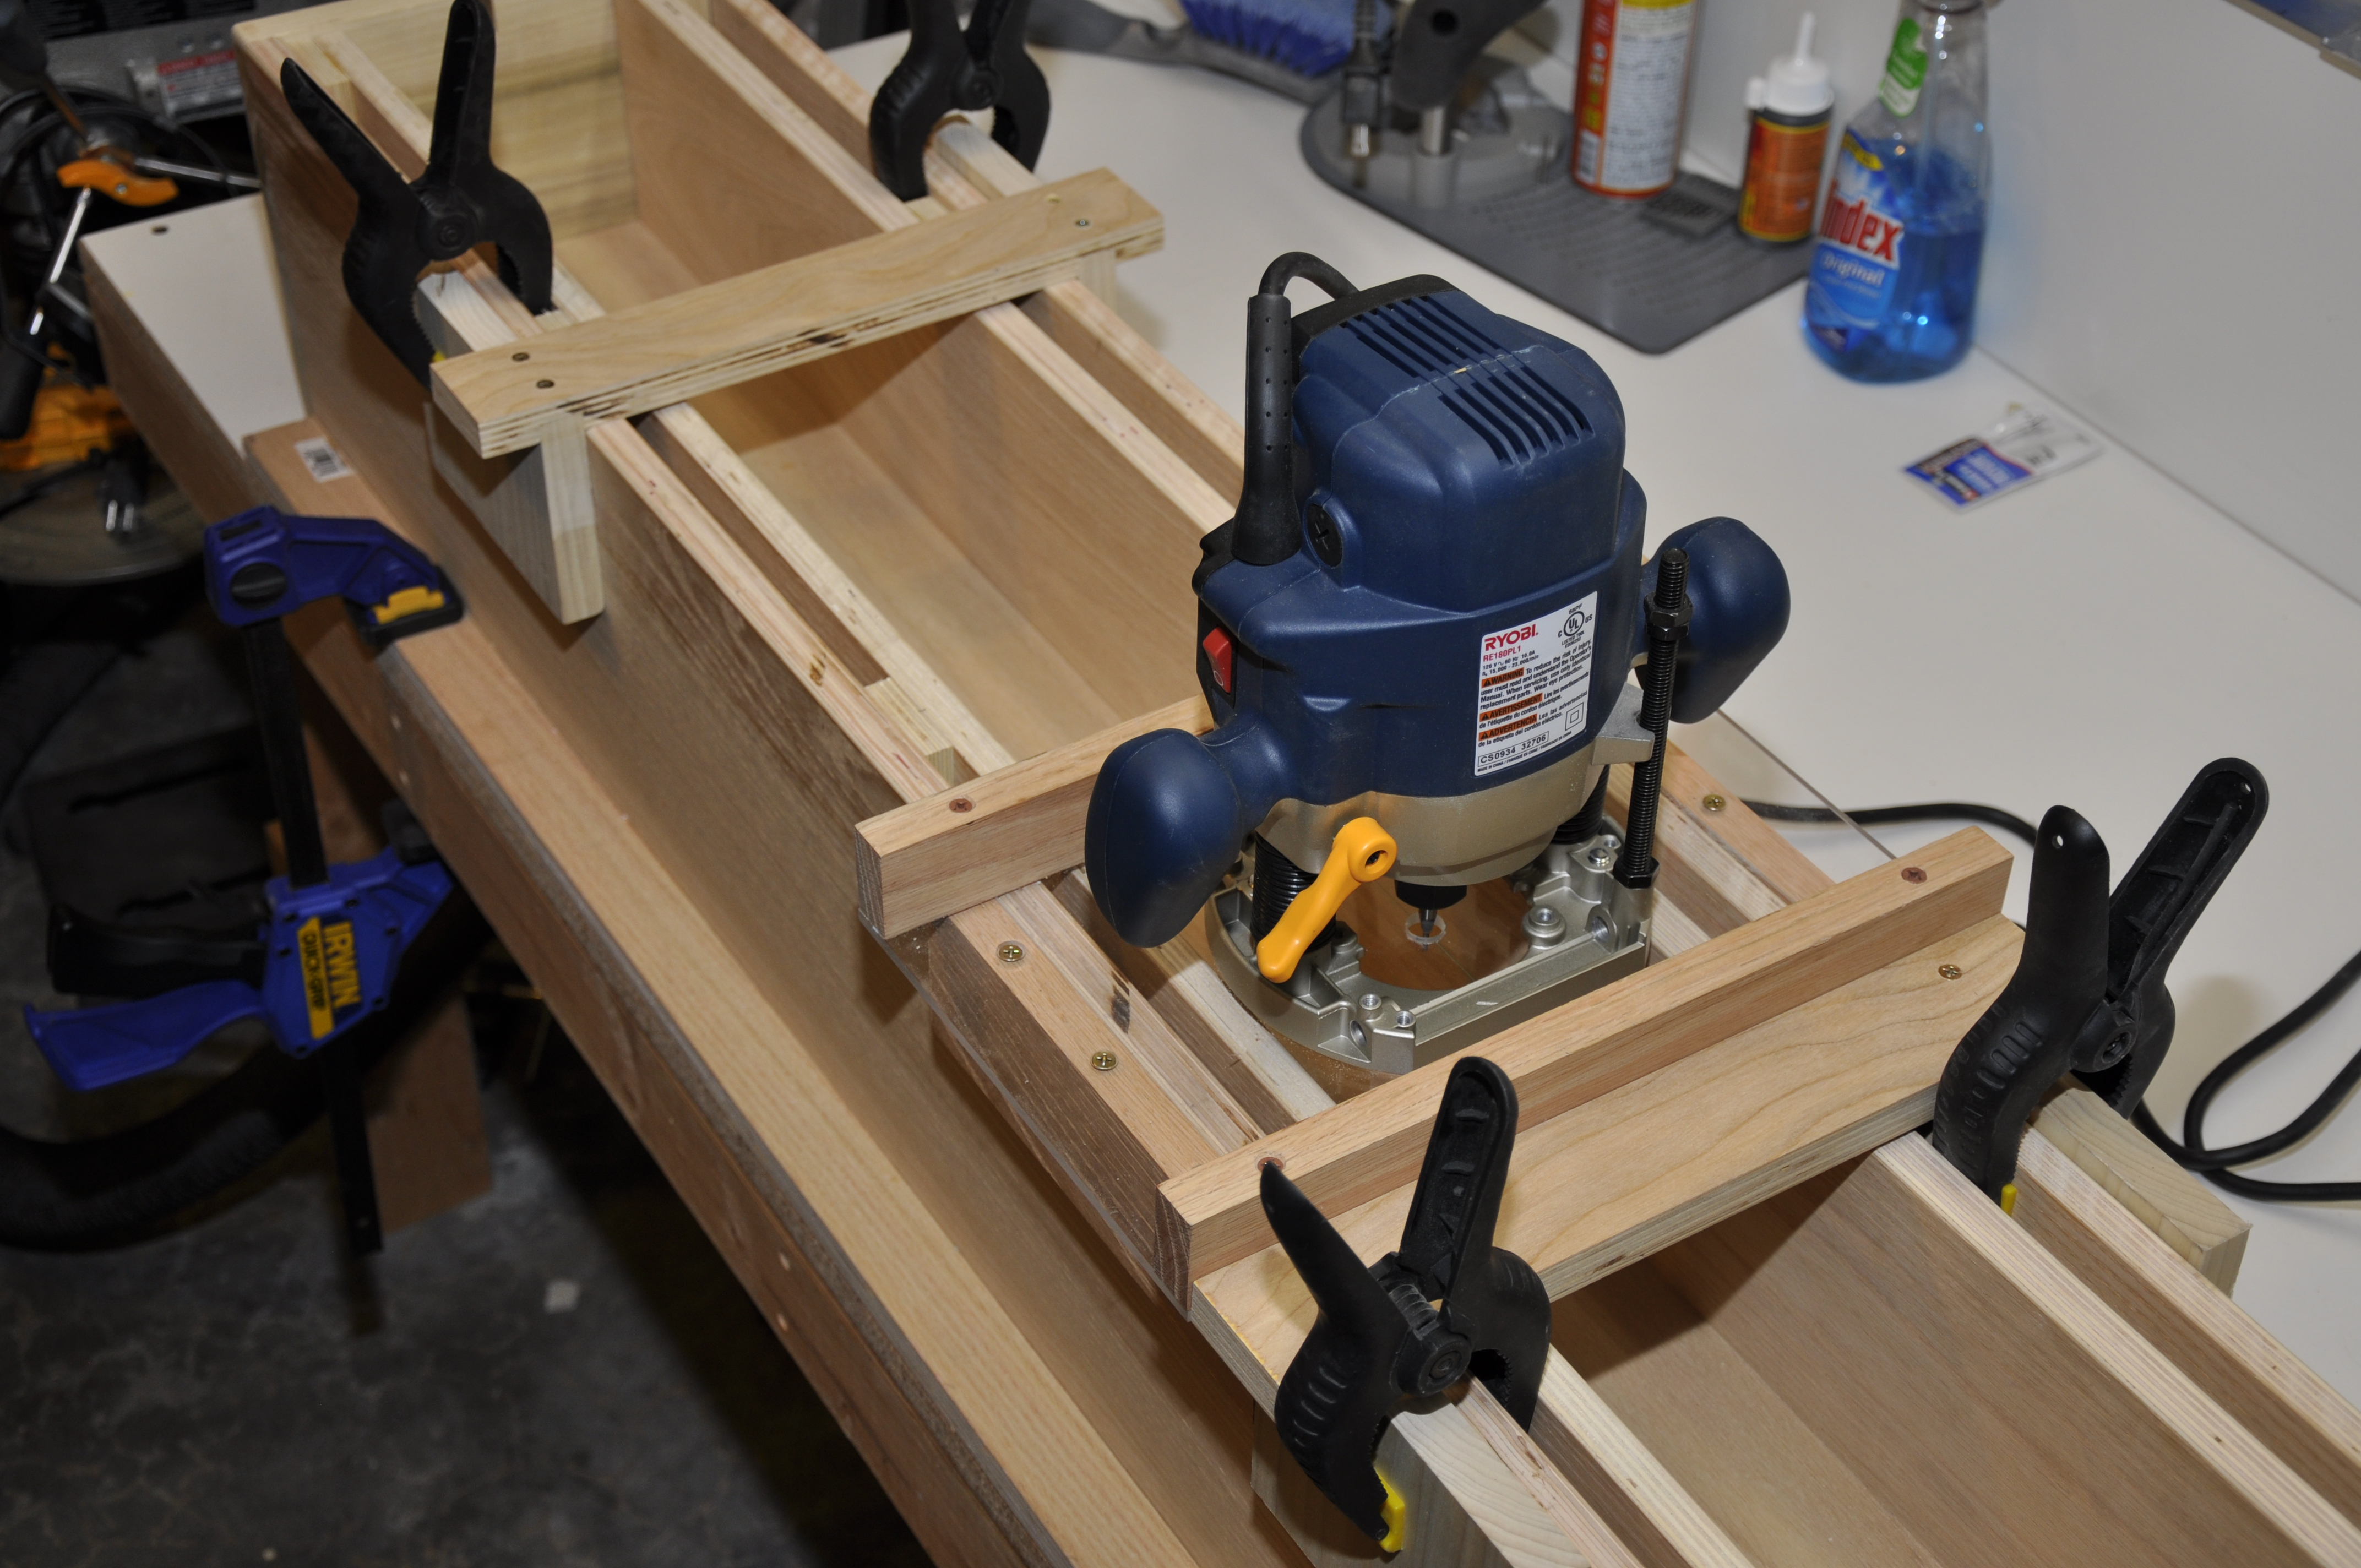
The jig is now set to cut a slot in the middle of a 5.5" airframe. Both stops are in place.
To use, the jig is clamped securely to a workbench and a marked airframe tube is placed in the appropriately-sized box with one of the marks at zero degrees. The stops are set at the appropriate distance on each end and the correct bit size (slightly larger than the fin width) is placed in the router. Amana carries every imaginable bit size (http://www.amanatool.com/bits-fv/45100.html), so this width can be very precise. Amana bits can be found at many online retailers. Home Depot and Lowe’s have some bits as well from Bosch and Freud. Be sure to get carbide-tipped bits. The carriage is placed against the stop farthest from the closed end of the jig. After checking the alignment, the router is turned on and allowed to come up to speed. The tip is then plunged through the airframe wall and locked in the down position. The entire carriage is pushed along the airframe toward the closed end of the jig. The cut is either stopped before the end of the airframe by the second stop or carried to the end by pushing the router through the end notch of the jig. Remember to wear safety goggles, ear protection, and a respirator, especially when working with fiberglass.
In all, this was a satisfying project. The initial fabrication takes some time (though probably not long at all for someone who, unlike me, has some some woodworking experience). The results are excellent, and cutting perfect fin slots only takes a few minutes.